Friday 30 September 2016

Tag Friday at A Vintage Journey

Hello everyone, here we are at the end of September, it's the fifth Friday of the month and that means it's Tag Friday over at A Vintage Journey. Here is the tag I put together:
It all started with a size 10 tag that I covered with some of my own made background papers. As I did these as part of an online course, I can't really reveal how I did it. but if you are interested you can find out more about the course here.

To add more interest to the background, I cut down another piece of the paper and frayed the edges.
I am trying to get into the mood for Halloween, so decided to use this quirky stamp by Teesha Moore as my focal image
She's not really a witch of course, I just love her pointy hat. I coloured her with Inktense Pencils.
Next I gathered some embellishments, left over from previous projects and then all I had to do was put it all together. 
Below a few close ups:

I adhered everything with foam tape and glue dots for some more depth and dimension.
Shadows (drawn with a Stabilo All pencil) also help to make the focal image pop a bit more.
I twisted some rusty wire around the rusted heart. It's a bit large for the tag but I tried a smaller one and that looked even worse, so in the end I stuck with the big one. I do like how the wire stamp (by Gaby Polacco), kind of links to the wire on the heart....
Well, that's it for today, thanks for your visit and make sure to check out the amazing tags my teamies have created, - plenty of inspiration there! All you need to do is clICk HERE
Have a lovely weekend everyone, hope you get some creative time!
xxx

Thursday 22 September 2016

And so the countdown begins....

Hello all and thanks for dropping in! I hope you are all well and happy! Today I am sharing my first Christmas card:
I have been so impressed with some of you who started your Christmas cards ages ago already.... and I was determined to start earlier this year than I usually do, so I am pleased that at least I have made a start.

I have loved some of the new Christmas goodies by Tim Holtz, but of course many of them are not yet available in the UK, so I decided to dig out my last year's(and earlier) Christmas things and just make a start with what I have....
The background papers are mostly from last year's paper stash, the nordic design was stamped and then clear embossed.
This little stamp is by Inkadinkadoo, the other elements are Sizzix dies and elements cut from the paper stash. Below a few close ups:
The globe, one of my all time favourite dies, this is the small thinlets version. I cut it from mirri card and then darkened it with a little brown paint.
This was also cut from mirri and coloured in the same way.
Somer little letter stickers, - the inner and outer peace we are all hoping for at Christmas time....
The finished card, mounted on a 6 x 6 card blank. I am going to try and keep my cards quite flat this year, so as to make it easier to send them through the post.

Well, that's it, one down and about 50 more to go.....
Thanks for taking the time to visit
xxx

Sunday 18 September 2016

Mixed Media Canvas for Shimmerz

Hello all and happy Sunday. Today it is a preview day here on my blog. To see the full project, please head over to Shimmerz
I love the colours of Autumn which are just starting here in the UK, - if you want to see more, just click HERE
Have a good week and thanks for dropping in!
xxx

Thursday 15 September 2016

Grungy tag card

Hello everyone, hope you are all having a good week! Today I want to share a card with you that I made with one of the tags I was doing to try and get my mojo back. (Not very successfully so far)....
Anyway, here goes:
I started by using a part of a background paper I created a while back. The original post for that can be found here.
The  paper was 12 x 12" so I cut it into four 6 x 6" papers and then chose one piece as the background. I trimmed it down a bit, added some stamping around the edges mostly, using the cool stamps by Gabrielle Polacco for 49and Market.
Next I selected some embellishments I wanted to use from my stash.
The focal point became one of the tags, to see how I made it, just click here:

The embellishments were altered in a similar way as I had done to the ones on the tag, - adding some matte medium and then sprinkling on some Stampendous Ancient Gold embossing powder.
Finally a Tim Holtz Ideaology word band finishes it all off.

It was all mounted on a 6 x 6 card blank and that was pretty much it.

Well, there you are, thanks for your visit like usual and happy creating!
xxx

Sunday 11 September 2016

It's beginning to look a lot like Christmas...

Hello everyone and thank you for dropping by. Sorry my post title is a bit of an oxymoron, as what I am sharing today is an advent calendar I made for by grand children.
While I was over in Australia my daughter in law requested one of these, and though I had planned to do it while over in there, I did not have the right crafting tools with me, so in the end I made it here and now will have to send it over, which is why I thought I better make it in very good time....

As you can probably guess, this is one of these Kaisercraft beyond the page calendars kits and I had great fun putting it together.
I used papers from the Graphics 45 12 days of Christmas collection. My challenge was to make something that was Christmassy yet not wintry, for of course in Australia it is summer.....
Both my grandchildren love the song of the 12 days of Christmas, so it seemed perfect.

Below some close ups:
The two little gnomes are supposed to be Santa's helpers, they are made with pipecleaners and bits of felt. The tree was cut with a Tim Holtz die, the two little sacks were made from calico, dyed with Distress spray stains, and the baskets I still had from the days I used to make dollshouse dolls many moons ago.
The roof bit was decorated with some Calico Craftparts that I still had in my stash from the days I was on their design team, all the other bits and pieces are part of the paper collection.

I had great fun decorating all the little drawers with bits and pieces from the papers
Another piece from Calico Craftparts, - it's hard to see from the main picture as it is hiding behind the little banner. I left all of the Craftparts completely unaltered as I like how the dark wood contrasts with the colourful papers.
Well, that's it pretty much. This was quite a bit of work, but I had great fun with it, even though I had to give up on my 10 day tag challenge, but hey ho, so be it.

Just a little word of warning, this kit came without any instructions what so ever and is actually quite tricky to put together. I could also not find any instructions anywhere online. Kaiser have a very brief video of a similar one, but as it is not the same, it was not much use, and without the help of my dear hubby, who is very clever with constructions like this I would have been totally lost!

Anyway, that's it from me for today, - have a good week and see you next time...
Thanks for your visit like always!
xxx

Friday 9 September 2016

Tag number 3

Time for the next tag, I am still creating one every day (but posting only every second day or so)...
This one is very different from number one and number two
It started out looking like this. The background was done with the help of a gelli plate, two colours of acrylic paint (Decoart English Iron Oxide and Golden Hansa Yellow Hue) and a stencil.
Next came some background stamping, using Orange Blossom and Sepia Archival inks.
Finally, the focal image is a scrap of a paper serviette, blended into the background with the help of a bit more of the same paints and some further stamping.
A couple of little embellishments and some Tim Holtz word stickers finish it all off.
Well, that's it for today, short and sweet.... I am having fun with these little wooden tags, even though I am not quite sure how I am going to use them. That's why there is no ribbon or twine at the top yet. I have all sorts of ideas floating in my head as to what I'll do with them, but more about that at some other point. Meanwhile, thanks for your visit today, your kind comments always warm my heart.
xxx


Wednesday 7 September 2016

Tag number two and a girl's day out

Hello all and thank you for your visit today, always so much appreciated.
Today I am sharing a second tag and some photos of a crafty get together I had while over in Australia.
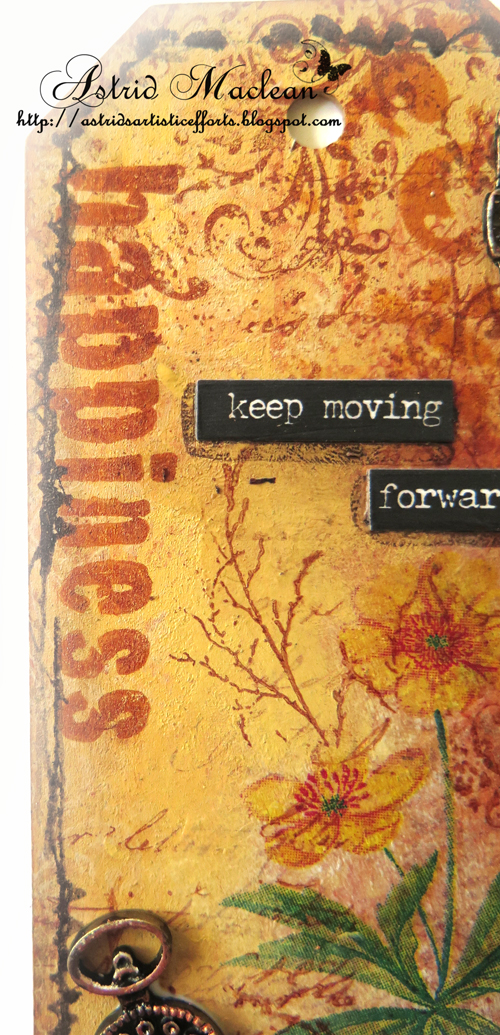
Here first of all, is my tag. If you missed number 1, just scroll down.
The base of this one was done with the help of some extra thick gesso and a mix of acrylic paints.
I dabbed some kitchen roll over the centre bit just before the gesso and paint had dried. That lifted the paint and gave it the shabby effect. Not really what I had planned, but I quite like the result, one to remember...
The next layer was created by dry brushing some paint over the textures. I also did some background stamping with white gesso and a crackle stamp and a small text stamp stamped in black archival.
Here's a close up of some of the textures and below the finished tag, embellished again with some Calico Craft Parts and a flower and some strips of tissue tape..
Now, as mentioned yesterday already, I had a wonderful day meeting up with crafty friends. These kind ladies took me out for a wonderful day exploring Hahndorf, shopping, eating, lots of laughter and we all exchanged some crafty gifts we had made for one another.
Below a photo of the 5 of us together
From left to right: Margaret, Heather, me, Helen and Adriana. I will show you the gifts I received below, but here are some photos still of each of us writing messages in the gifts we received, - such a lovely memory and keepsake.


And here finally the wonderful gifts I received:
A stunning, multi layered tag from Heather. You can see many more photos of this beauty on her blog
This beautiful textured card was from Adriana, I just love the vibrant colours and pretty embellishments
And finally, this amazing little folder was made by Margaret, she did one for each of us, just incredible. It is her own design, but a bit like Tim Holtz's file folders, just smaller and with loads of pockets and photo mats. Below a picture of one of the inside pages:
She made it specially so that we could keep the photos of this special day. I am completely in awe of the clever design of this. Margaret has promised she will do a post one day of how she made it. Meanwhile she did a beautiful description of our special day with extensive photos of our projects. She is a much better photographer than I am, so if you are interested, do check it out, - just click HERE

Well, that's it for today, thanks for dropping by and happy crafting!!

Related Posts Plugin for WordPress, Blogger...

One World One Heart

Photo

FEEDJIT Live Traffic Feed

Birthday Card

Birthday Card
Just got a whole lot of new stamps from a brilliant place called the Stamp Smith. This is the image that I first saw on Docraft and really liked. I asked the friend who has used it in an ATC, where she got it. Well she borrowed it from a friend who got it from ebay as a one off. But.... it had a title. I googled the title, and hey presto found the site. They have great stamps and offer a really friendly fast service. I highly recommend them!

Gothic Arch Trifold inside

Gothic Arch Trifold inside

Back of Gothic Arch Trifold

Back of Gothic Arch Trifold

Gothic Arch Within the Heart

Gothic Arch Within the Heart

Gothic Arch, the Key

Gothic Arch, the Key